patina-image-to-material
Predicts seamless high-resolution PBR material maps (basecolor, normal, roughness, metalness, height) from a single input image via fal.ai PATINA.
If you have ever spent an afternoon hand-painting a normal map, or scrubbing through texture libraries looking for a weathered concrete that tiles without visible seams, you already know the problem Patina solves. PBR material creation is one of those tasks that sits at the intersection of technical precision and creative judgment - and it eats time in a way that rarely feels proportional to the result. You need an albedo map, a normal map, roughness, metalness, height, maybe ambient occlusion. Each one has to be physically plausible. They all have to agree with each other. And ideally, the whole set tiles seamlessly at whatever resolution your engine demands.
Patina, available through inference.sh, is a specialized material generation system built by fal.ai on a modified FLUX.2 [klein] backbone - a latent flow-matching system that couples a vision-language model with a rectified flow transformer, with the klein variant specifically optimized for image transformation. The model was trained on CC0 material libraries including AmbientCG, Poly Haven, and other public-domain sources, with maps rendered in dozens of different lighting scenarios using a custom Cook-Torrance BRDF renderer. It operates in three distinct modes: generating materials from text descriptions, extracting them from photographs, and predicting full PBR map sets from single images. I want to walk through each mode honestly, because they solve different problems and have different strengths.
text-to-material: describing surfaces into existence
The text-to-material pipeline is conceptually the simplest of the three. You write a description of the surface you want - "polished granite with subtle veining" or "rough bark from a pine tree" - and Patina generates a seamlessly tiling texture along with the corresponding PBR maps. The output is a complete material ready to drop into Unreal, Unity, Blender, or whatever your DCC tool of choice happens to be.
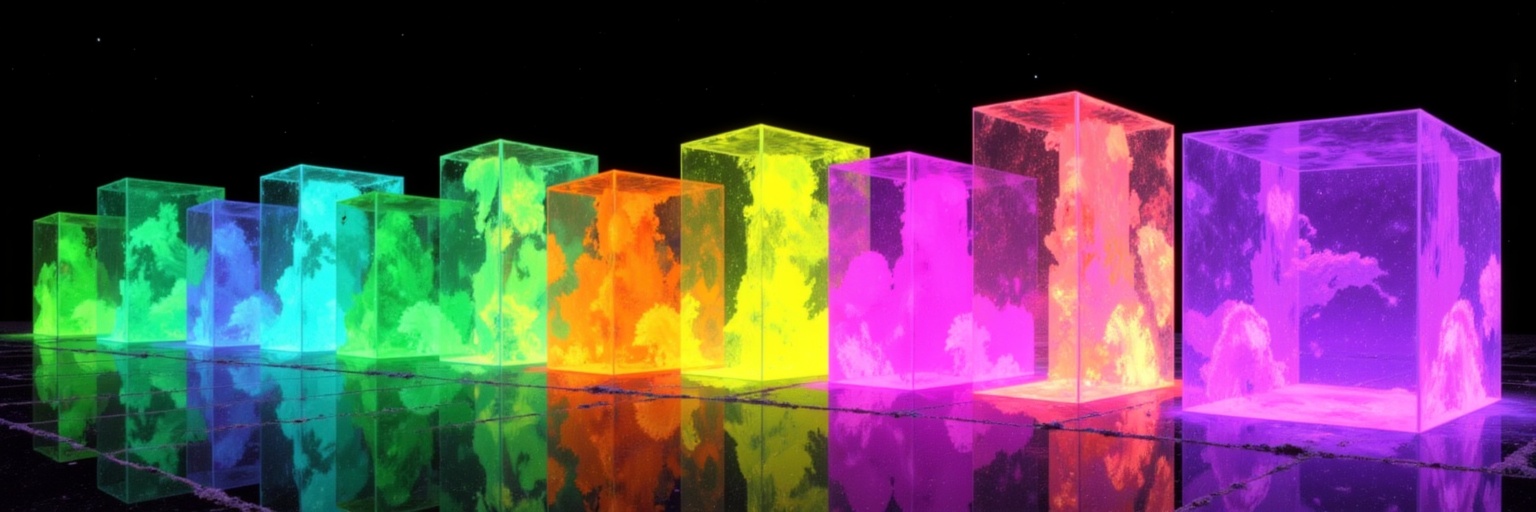
What makes this more than a parlor trick is the tiling. Generating a texture that looks good in isolation is relatively straightforward for modern diffusion models. Generating one that tiles seamlessly in both directions, without visible repetition artifacts at reasonable viewing distances, is substantially harder. Patina handles this through a latent-space tiling approach where tile size and stride are configurable, meaning you can control the balance between repetition suppression and coherence. The default settings work well for most cases, but having those knobs available matters when you are building environments where the same material covers large areas.
The prompt expansion feature is worth noting. When enabled, it feeds your description through a language model to add physical detail - the kind of micro-descriptions that help the diffusion process generate more plausible surfaces. A prompt like "rusty metal" becomes something more specific about the character of the oxidation, the underlying steel tone, how the rust clusters. I find this useful for quick iteration but sometimes prefer to write my own detailed prompts when I have a specific reference in mind.
Resolution scales up to 8K through an integrated upscaling step using SeedVR, with 2x and 4x options. The base generation happens at a lower resolution where the diffusion model works best, then the upscaler adds high-frequency detail. This is a practical compromise. Running diffusion directly at 8K would be prohibitively expensive and slow. The two-stage approach gets you there for a fraction of the cost, though if you compare the result pixel-for-pixel against a manually authored 8K texture, you will notice the upscaled version lacks some of the intentional detail work a texture artist would add.
Pricing follows a per-megapixel structure that scales with resolution and the number of maps generated. The cost is low enough to iterate freely but not so low that you would generate thousands without thinking about it.
extract-from-photo: pulling materials out of the real world
This is the mode I find most interesting from a workflow perspective. You feed Patina a photograph - a wall, a floor, a piece of fabric, anything with surface detail - along with a text prompt describing what to extract, and it generates a tileable texture plus PBR maps from the relevant region.
The use case is obvious if you have ever tried to use a photograph directly as a texture. Photos have lighting baked in. They have perspective distortion. They do not tile. They contain shadows from the environment that will look wrong when re-lit in your 3D scene. What you actually want is the surface's intrinsic appearance, separated from the conditions under which it was photographed.
Patina's extraction mode attempts this separation. The prompt guides it toward the specific material in the image - useful when a photo contains multiple surfaces and you only care about one. A strength parameter controls how aggressively the model transforms the input versus preserving its literal appearance. Lower strength keeps more of the original photo's character; higher strength gives the model more freedom to idealize and clean up the result.
I should be honest about limitations here. Extracting materials from photos is an inherently ambiguous task. The model has to infer surface properties that were not directly captured - it has to guess the roughness from visual cues, separate color from lighting, estimate height from shading. It does this well enough for production use in most cases, particularly for common architectural materials like brick, wood, stone, and concrete. For unusual or highly specular materials - polished chrome, iridescent surfaces, translucent materials - the predictions become less reliable. You will likely need manual adjustment of the generated maps for those cases.
The base cost is slightly higher here, reflecting the additional complexity of analyzing the input image before generation.
image-to-material: pure map prediction
The third mode is the most constrained and, in some ways, the most useful for a specific workflow. You provide an image - either a photograph or an existing texture - and Patina predicts the PBR maps for it. No new texture generation happens. No tiling is applied. It simply looks at the image and produces normal, roughness, metalness, height, and basecolor maps that correspond to the visible surface.
This fills a gap that 3D artists encounter constantly. You have a texture - maybe you painted it by hand, maybe you found it in a library, maybe someone on your team created it years ago - and you need the corresponding PBR maps. Creating those manually means opening the texture in Photoshop or Substance, carefully painting each channel based on your understanding of the surface. It is skilled work and it takes time.
Patina's prediction mode automates the first pass. I want to emphasize "first pass" because the results are good enough to use directly in many cases but will benefit from manual refinement for hero assets or close-up materials. The model understands common surface types well - it knows that the grain in wood should generate specific normal map patterns, that scratches in metal imply roughness variation, that grout lines between tiles represent height differences. For ground-truth-critical work, you will still want a texture artist to review and adjust. For environment dressing, background materials, and rapid prototyping, the predictions are production-ready.
The pricing here is the simplest of the three modes. It's cheap enough to process an entire texture library programmatically.
the tiling question
Seamless tiling deserves its own discussion because it is the single most important property for game and archviz materials, and also the hardest to get right with generative models.
Patina offers three tiling modes: both directions (the default and most common need), horizontal only, and vertical only. The directional options exist for specific use cases - think of a wallpaper pattern that repeats horizontally but has a vertical gradient, or a road surface that tiles along its length but has unique features across its width.
The tiling mechanism works in latent space, which means the seams are addressed during generation rather than fixed up afterward. This is a meaningful distinction. Post-hoc tiling fixes - mirroring edges, blending seams, offset-and-patch approaches - all introduce visible artifacts at the boundaries. When tiling is integrated into the generation process, the model can produce genuinely seamless results without those telltale blurred borders.
That said, tiling quality degrades as you push toward very small tile sizes. If your tile repeats every few hundred pixels, viewers will notice the repetition pattern in large surfaces regardless of how clean the seams are. Larger tile sizes give more visual variety within each repeat but require more VRAM and processing time. The defaults are reasonable for most game engine use cases.
where this fits in a real pipeline
Patina is not going to replace Substance Designer or Megascans (now part of Epic's Fab marketplace) for teams that need absolute control over every aspect of their materials. Those tools exist for a reason - they give artists pixel-level authority over every channel, physically measured scan data, and libraries built from real-world captures with known accuracy.
What Patina does replace is the part of the pipeline where you need something good enough, right now. Early in a project when you are blocking out environments and need placeholder materials that actually look like materials rather than flat colors. During prototyping when you want to test twenty different surface treatments on a wall before committing to one. When a level designer needs a specific texture variant that does not exist in the library and cannot wait two days for the texture team to create it.
I also see value in the extraction mode for reference workflows. Shoot a photo of an interesting surface in the real world, extract a material from it, and use that as a starting point for a handcrafted version in Substance. The AI does the boring part - separating albedo from lighting, generating plausible normals from the image - and the artist does the refined work on top.
Costs scale linearly with resolution. A low-resolution material for mobile games costs almost nothing, while higher-resolution materials for film-quality close-ups cost more but remain far cheaper than the artist hours required to create one from scratch. The economics make sense for any team generating more than a handful of materials per week.
what to watch for
Generated PBR maps are predictions, not measurements. The normal map Patina produces for a brick wall is a plausible approximation of how that surface would scatter light, not a photogrammetric capture of actual surface geometry. For most rendering contexts this distinction is academic - the visual result looks correct. But if you are doing physically accurate simulation work or need materials that match real-world measurements for product visualization, generated maps will not satisfy those requirements.
The metalness predictions can be overconfident on ambiguous surfaces. Materials that have metallic-looking finishes without being actual metals - glazed ceramics, certain plastics, wet surfaces - sometimes get tagged with higher metalness values than they should have. This is easy to correct manually but worth checking in your material review process.
Height map quality varies more than the other channels. Height is the most ambiguous property to infer from a flat image, and the predictions sometimes produce overly smooth displacement that lacks the micro-detail you would get from a proper photogrammetric scan. For materials where displacement matters to the silhouette - cobblestones, rough bark, deep fabric weaves - you may want to enhance the generated height map manually.
how does Patina compare to Substance Sampler?
Adobe Substance 3D Sampler (previously Substance Alchemist) does similar photo-to-material conversion with more manual control and local processing. Patina trades that control for speed and API accessibility. If you need to process one material with careful art direction, Sampler gives you more tools. If you need to process fifty materials programmatically or integrate material generation into an automated pipeline, Patina's API-first approach is more practical. The quality is comparable for common material types, with Sampler having an edge on unusual surfaces where manual guidance helps.
what resolutions work best?
The sweet spot for most game development work is 1024x1024 or 2048x2048 base generation. These resolutions give the diffusion model enough space to produce coherent surface detail without excessive cost or processing time. For higher resolutions, the 2x upscale option (producing 2048 or 4096 from the base) offers good quality-to-cost ratio. The 4x upscale to 8K is available but I would reserve it for hero materials or architectural visualization where the camera gets very close to surfaces. Most game engines will mipmap down from 4K anyway.
can these materials pass for hand-authored work?
For environment and background materials, yes - in most cases a viewer will not distinguish Patina output from artist-created textures at normal viewing distances. The generated maps are physically plausible and internally consistent, which is what matters for correct lighting response. Where the difference shows is in intentional artistic choices: hand-authored materials often include subtle storytelling details (a specific wear pattern suggesting foot traffic, rust concentrated where water would pool) that generated materials handle in a more generic way. For hero assets and narrative-driven surface design, treat Patina output as a strong starting point rather than a finished product.
api reference
about
predicts seamless high-resolution pbr material maps (basecolor, normal, roughness, metalness, height) from a single input image via fal.ai patina.
1. calling the api
install the client
the client provides a convenient way to interact with the api.
1pip install inferenceshsetup your api key
set INFERENCE_API_KEY as an environment variable. get your key from settings → api keys.
1export INFERENCE_API_KEY="inf_your_key"run and get result
submit a request and wait for the final result. best for batch processing or when you don't need progress updates.
1from inferencesh import inference23client = inference()456result = client.run({7 "app": "falai/patina-image-to-material",8 "input": {}9 })1011print(result["output"])stream live updates
get real-time progress updates as the task runs. ideal for showing progress bars, partial results, or long-running tasks.
1from inferencesh import inference23client = inference()456# stream=True yields updates as they arrive7for update in client.run({8 "app": "falai/patina-image-to-material",9 "input": {}10 }, stream=True):11 if update.get("progress"):12 print(f"progress: {update['progress']}%")13 if update.get("output"):14 print(f"output: {update['output']}")2. authentication
the api uses api keys for authentication. see the authentication docs for detailed setup instructions.
3. files
file inputs are automatically handled by the sdk. you can pass local paths, urls, or base64 data.
automatic upload
the python sdk automatically detects local file paths and uploads them. urls are passed through as-is.
1# local file paths are automatically uploaded2result = client.run({3 "app": "falai/patina-image-to-material",4 "input": {5 "image": "/path/to/local/image.png", # detected & uploaded6 "audio": "https://example.com/audio.mp3", # url passed through7 }8})4. webhooks
get notified when a task completes by providing a webhook url. when the task reaches a terminal state (completed, failed, or cancelled), a POST request is sent to your url with the task result.
1result = client.run({2 "app": "falai/patina-image-to-material",3 "input": {},4 "webhook": "https://your-server.com/webhook"5}, wait=False)webhook payload
your endpoint receives a JSON POST with the task result:
1{2 "id": "task_abc123",3 "status": 9,4 "output": { ... },5 "error": "",6 "session_id": null,7 "created_at": "2024-01-15T10:30:00Z",8 "updated_at": "2024-01-15T10:30:05Z"9}5. schema
input
input image (photograph or render) to derive pbr maps from. jpeg, png, or webp.
predict the basecolor (albedo) map.
predict the normal map.
predict the roughness map.
predict the metalness map.
predict the height (displacement) map.
output image format for the predicted maps.
enable the fal.ai safety checker on the input image.
random seed for reproducible denoising. leave unset for a random seed.
ready to run patina-image-to-material?
we use cookies
we use cookies to ensure you get the best experience on our website. for more information on how we use cookies, please see our cookie policy.
by clicking "accept", you agree to our use of cookies.
learn more.